Saturday, November 9, 2024

Lose Weight Fast at Home: 10 Best Workout Routines That Actually Work

Losing weight can be challenging, but regular exercise is one of the most effective ways to burn calories and shed unwanted pounds.

Losing belly fat has many health benefits, including reducing the risk of heart disease, diabetes, and even cancer. Losing weight, especially belly fat, also improves blood vessel functioning and sleep quality.

There are also big health benefits to having a low body fat percentage, like jeans fitting more comfortably and muscles looking more toned and defined.

This blog will explore some of the best weight loss exercises and how they can help you achieve your fitness goals.

Ready to get started? Let’s begin!

Know: 100+ Safe And Fast Ways To Lose Weight (Backed By Science)

Best Weight Loss Exercises

It has been scientifically proven that regular physical activity can improve overall well-being beyond the aesthetic benefits.

Weight loss exercises are any type of physical activity that helps you burn calories and lose weight.

Most weight loss exercises focus on maximizing calorie burn and improving cardiovascular health. Popular cardio options like running, cycling, swimming, and brisk walking engage the leg and core muscles to elevate your heart rate.

Other practical calorie-blasting exercises include aerobics classes, jumping rope, and high-intensity interval training (HIIT).

BUT, not all forms of physical activity are equally effective for weight loss. Certain types of exercise are more effective than others.

There are several major categories for the most proven weight loss exercises.

When you start a new exercise program to lose weight, choose activities that are good for your current fitness level. Walking and swimming are good workouts for people who are new to exercise.

The best way to reduce weight is to exercise for 30 minutes 3 to 4 times per week and eat healthily. This will burn calories and fat in your body.

10 Best Weight Loss Exercises at Home

Here are the 10 best and most popular exercise programs that you can do at home to strengthen, fit, and improve your health.

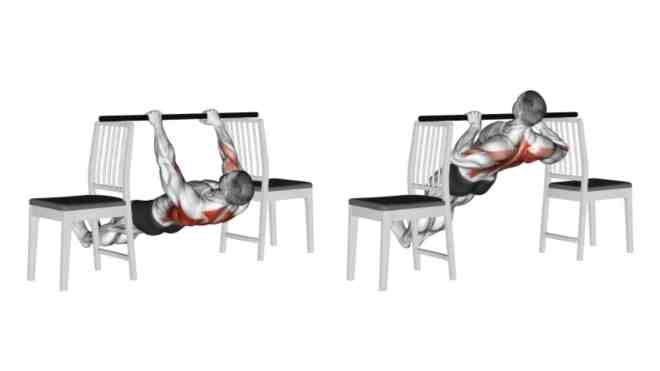
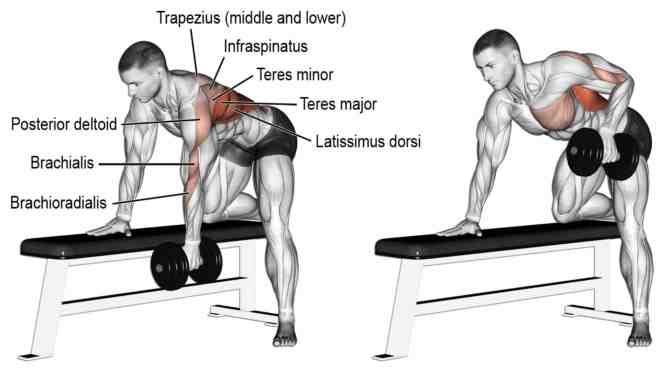
1. Strength Training

Strength training usually involves lifting weights or exercises that challenge your muscles and require much effort.

These intense workouts demand more energy and can increase your metabolic rate during the workout and as your body recovers.

Working out muscles not only helps you lose weight, but it also keeps your muscles strong and healthy.

As you train your muscles and get stronger, your body gets better at using energy and nutrients. This improved efficiency can lead to a higher metabolic rate even at rest.

This study reviewed 149 studies and found that exercise training programs can be effective for weight loss, body composition changes, and weight maintenance in adults with overweight or obesity.

In a six-month study, it was found that doing 11 minutes of strength-based exercises three times per week resulted in an average 7.4% increase in metabolic rate, equivalent to burning an additional 125 calories per day.

Strength Training For Weight Loss

  • Bodyweight Training: Includes exercises like push-ups, pull-ups, planks, and squats.
  • Resistance Bands Exercises: Improve strength, balance, and flexibility. Great for rehabilitation and low-impact workouts.
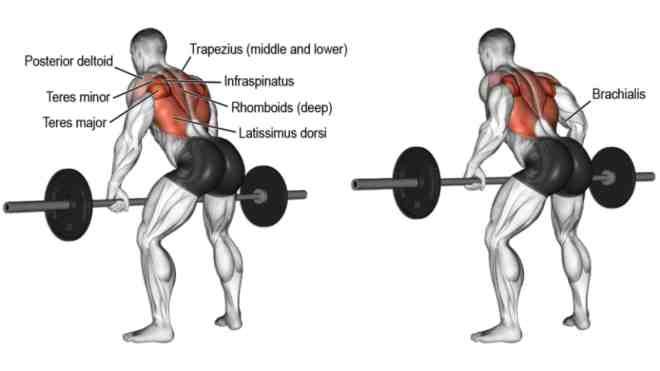
  • Free Weights Exercises: Include dumbbell and barbell exercises. Improve muscle strength, endurance, and coordination.
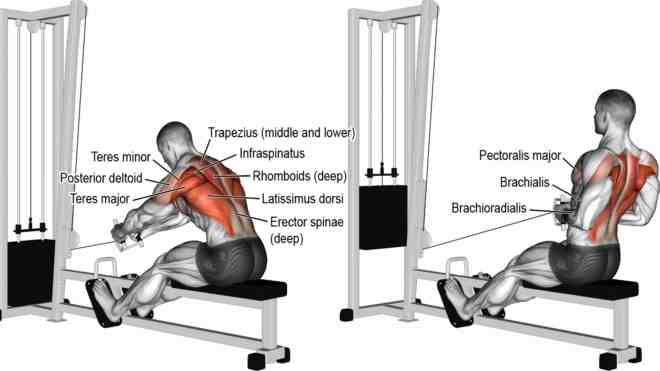
  • Machines: They are often easier for beginners than free weights, such as leg press, chest press, and cable machines.
  • Powerlifting: Builds significant strength and muscle mass. Primarily squats, bench presses, and deadlifts.
  • Isometric Training improves strength and endurance. It involves exercises where the muscle length does not change, such as planks or wall sits.

2. Cardio Exercises

Cardio, or cardiovascular exercise, is any exercise that raises your heart rate and pumps blood. It is a great way to burn calories and lose weight.

Cardio exercises can help to improve your metabolism, which can help you burn more calories throughout the day.

There are different ways to do cardio exercises. You can do them inside or outside, with or without equipment. Therefore, it is important to find an activity that suits you the best and is enjoyable so that you can stick to it in the long run.

It’s nice, helping to improve balance, agility, coordination, strength, flexibility, and blood circulation — almost like getting a full-body workout with just one exercise.

3. Do High-Intensity Interval Training (HIIT)

HIIT, is a form of interval training, a cardiovascular workout involves alternating between short, intense bursts of exercise and brief recovery periods.

This form of exercise has been shown to increase metabolism and promote fat burning even after the workout is over. Consider incorporating HIIT sessions into your weekly routine to maximize calorie burn.

The research shows that HIIT, especially short, intense exercises like sprinting, effectively reduces body fat.

HIIT workouts provide improved athletic capacity and condition, as well as improved glucose metabolism.

The intense intervals spike calorie burn and EPOC (excess post-exercise oxygen consumption) so your body burns more calories after exercise.

How To Start HIIT Workout To Lose Weight

  1. Duration: Keep HIIT workouts short; typically, they should not exceed 30 minutes.
  2. Frequency: Due to its intensity, 2–3 HIIT sessions per week are generally sufficient, with rest or lower-intensity exercise on other days.
  3. Intensity: The high-intensity periods should be performed at near-maximum effort.
  4. Progression: Gradually increase the intensity or duration of the high-intensity intervals as you get fitter.

HIIT workouts can be done with any type of exercise, but some of the most popular HIIT exercises include:

  • Burpees
  • Jumping jacks
  • Jump rope
  • Mountain climbers
  • High knees
  • Battle ropes
  • Butt kicks
  • Stair running
  • Lunges

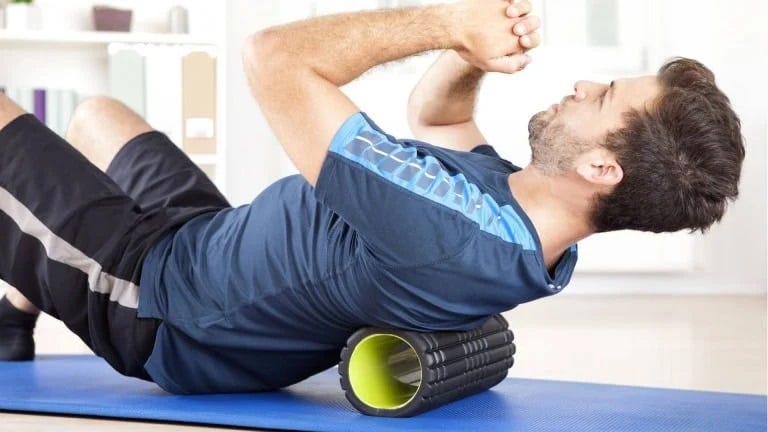
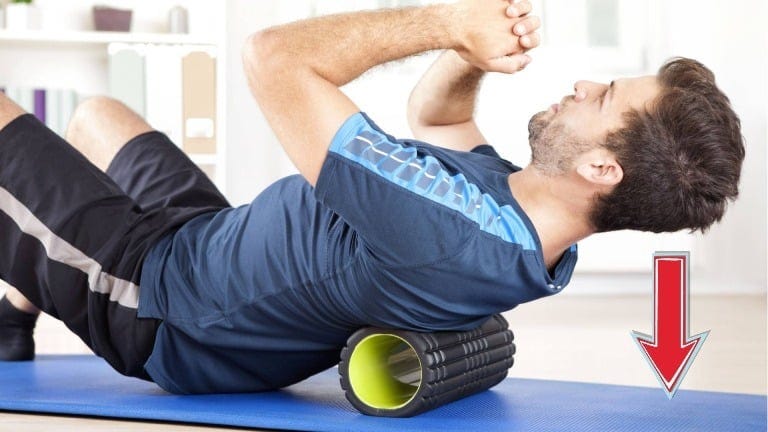
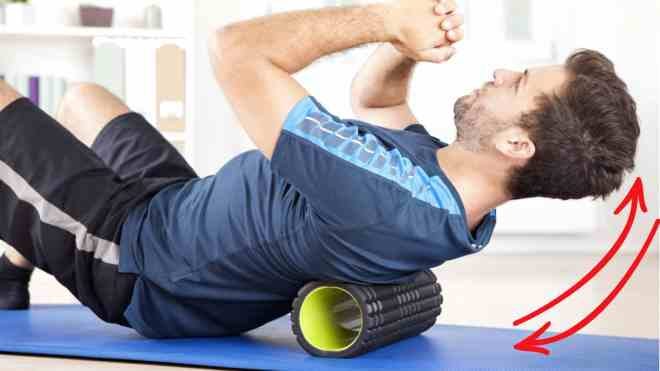
4. Abs and Core Focused Exercises

Getting toned, defined abs is often a top fitness goal. Exercises that target the abdominal muscles and core not only build a strong midsection, they also burn belly fat.

A stronger core means better posture, injury prevention, and faster calorie burning. To trim your waistline, focus on these key abs and core exercises twice to thrice weekly.

You don’t have to spend hours at the gym or use expensive equipment to get visible abs. With the right home workout plan, you can target your core effectively and get closer to those six-pack goals.

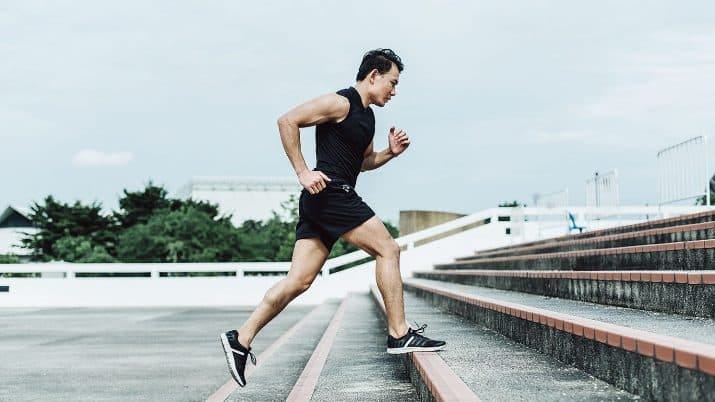
6. Walking, Jogging and Running

If you have time, walk anywhere. Consider walking there or riding a bike if work or the grocery store is not far away. It may take you longer, but you’ll get your workout in simultaneously.

Depending on your sex and weight, walking a mile (1.6 km) burns approximately 100 calories.

According to a small study, women with obesity who walked for 50–70 minutes three times a week for 12 weeks, on average, lost weight and reduced their waist circumference.

According to Harvard Health, a 155-pound person can expect to burn about 288 calories by jogging for 30 minutes at a pace of 5 miles per hour (8 km/h). If that same person increases their speed (running) to 6 miles per hour (9.7 km/h) for a 30-minute run, they will burn approximately 360 calories.

7. Yoga

Practising yoga regularly can also calm you and improve your mental health, leading to more mindful and healthy food choices that directly aid in weight loss.

Studies have shown that yoga can reduce stress and cortisol levels, enhance mood, decrease anxiety and depression, improve sleep, and improve chronic conditions such as hypertension and diabetes.

A 12-week study of 60 women with obesity found that those who did two 90-minute yoga sessions a week lost more weight than those who did not.

A 2015 study found that practising yoga led participants to make healthier eating choices.

Type of Yoga To Lose Weight

  • Vinyasa Yoga: Known for its fluid, movement-intensive practices, Vinyasa is great for calorie burning.
  • Ashtanga Yoga: A rigorous style of yoga that follows a specific sequence of poses and is great for building strength and endurance.
  • Power Yoga: An intense practice that builds muscle, ideal for weight loss and muscle toning.
  • Hot Yoga/Bikram Yoga: Performed in a heated room, increases flexibility and calorie burn.

High-intensity yoga styles like Ashtanga, Vinyasa, and Power yoga burn the most calories.

8. Cycling

Cycling offers both cardiovascular and muscular benefits and is an excellent way to lose weight. It is low-impact and high-efficiency and can be enjoyed outdoors or indoors using a stationary bike.

Cycling is a convenient activity that can be done outdoors or while watching TV using a stationary bike at home. More opportunities to exercise make weight loss easier.

Harvard Health estimates a 155-pound person burns 252 calories cycling moderately for 30 minutes on a stationary bike, or 288 calories biking at a moderate 12–13.9 mph pace.

Planning Your Cycling Routine

  • Choose the Right Bike: Ensure the bike fits you properly and is comfortable for long rides.
  • Frequency: Aim to cycle at least 3–4 times a week.
  • Duration: Start with shorter rides (20–30 minutes) and gradually increase to longer rides (1–2 hours or more).
  • Intensity: Vary your cycling intensity — mix longer, steadier rides with shorter, high-intensity sessions.
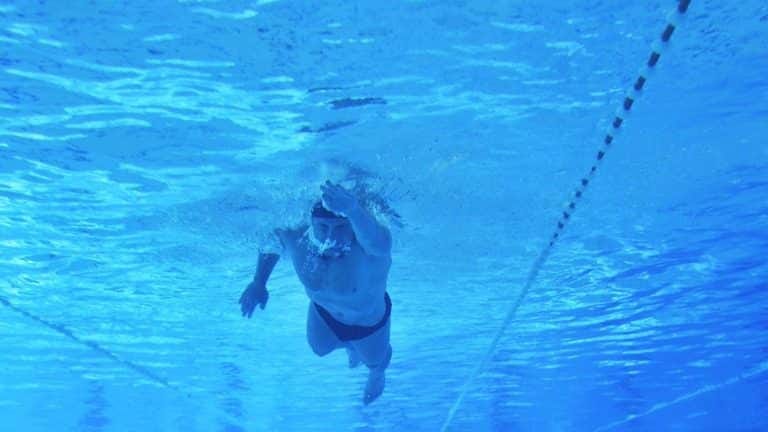
9. Start Swimming

Swimming is a great way to get in shape if you don’t like going to the gym or can’t do certain things because of joint pain.

Water-based workouts are low-impact, making them easier on your hips, knees, and feet.

A 12-week study found swimming 60 minutes 3 times per week significantly lowered body fat, improved flexibility, and reduced heart disease risk factors in middle-aged women.

Here are some of the top reasons how starting a regular swimming program can help you lose weight:

  • Swimming can help you burn calories and build muscles without hurting your body, like running. Depending on your intensity and weight, swimming burns between 500 and 800 calories per hour.
  • The resistance provided by the water activates arm, shoulder, chest, back, leg and core muscles. Building this muscle mass leads to a boosted metabolism.
  • Swimming is ideal for beginners or those with injuries since it does not put pressure on joints. It is also a low-risk exercise, so you can work out frequently.
  • Water workouts boost your heart health, improving cardiovascular endurance so your body burns fat efficiently.

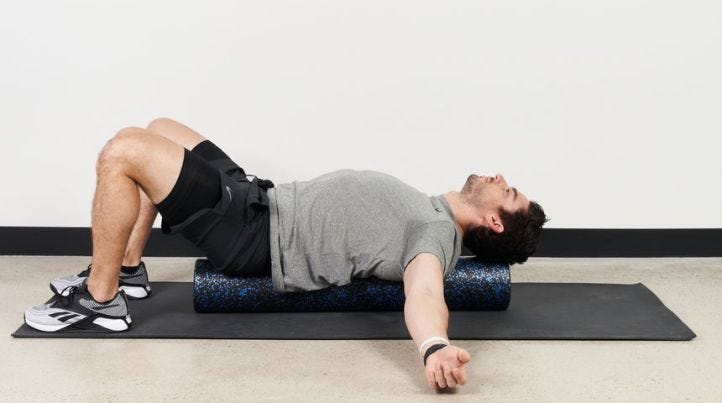
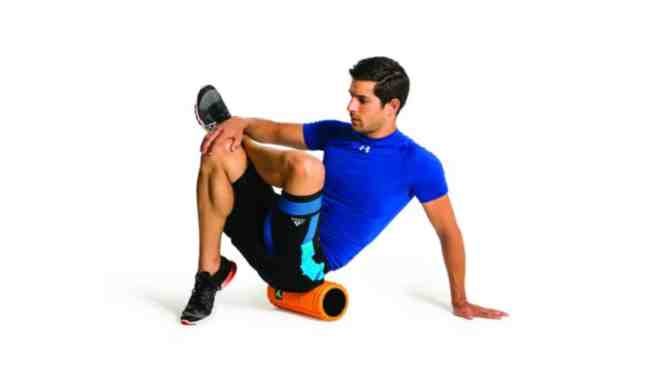
10. Stretching Routines and Pilates

Stretching routines alone aren’t usually the best way to lose weight because they don’t burn as many calories as cardio or strength training exercises.

But stretching can also make you fitter and more flexible and help you recover, which can help you lose weight faster.

I. Dynamic Stretching Routine (Pre-Workout)

Dynamic stretches can increase the reach, speed, or both of your body. They are also a good way to warm up your muscles before a workout.

  • Leg Swings: Forward, backwards, and side-to-side to loosen the hips and thighs.
  • Arm Circles: Large and small circles to warm up the shoulders.
  • Lunges with a Twist: Helps warm up the legs, hips, and torso.
  • High Knees: Lift knees one at a time as high as possible to warm up the hips and thighs.
  • Calf Stretch: Against a wall or on the edge of a step.

II. Static Stretching Routine (Post-Workout)

Static stretches involve stretching a muscle (or group of muscles) to its farthest point and then maintaining or holding that position.

  • Hamstring Stretch: Sitting or standing, extend one leg and reach toward your toes.
  • Quadriceps Stretch: While standing, pull one foot towards your buttocks, feeling the stretch in the front of the thigh.
  • Shoulder Stretch: Bring one arm across your body and lightly press it to stretch the shoulder.
  • Triceps Stretch: Raise one arm, bend it backward to touch the back, and use the other hand to gently press the elbow.

III. Pilates-Inspired Stretching

Pilates exercises focus on core strength but also include elements of stretching that can improve flexibility and muscle tone.

A study found that middle-aged women who did Pilates three times a week for eight weeks significantly reduced their waist, stomach, and hip size compared to a non-exercising control group.

  • The Saw: Stretches the hamstrings and twists the spine.
  • Mermaid Stretch: Side stretches to open up the side of the body.
  • Spine Stretch: Sitting stretch that encourages a range of motion in the spine.

FAQs

What type of exercise is best for weight loss?

For anyone looking to lose weight, it is essential to incorporate strength training and cardiovascular exercises into their routine. When combined with the right diet, this will help them achieve their weight loss goals.

Can you lose weight by exercising 30 minutes a day?

Yes, you can. But you need to ensure you do the correct exercises with good intensity, and frequency.

But, if your goal is to lose weight quickly, you must increase your workout time.

It’s a good idea to contact a certified fitness trainer to learn what exercises you need to do and how.

How Much Weight Can You Lose in 1 Week by Exercising at Home?

The weight you lose is based on how many calories you burn. If you burn around 500 calories a day, you should be able to lose half a kilogram of weight within a week. You can also make changes to your diet to create a calorie deficit.

If you want to shed weight at the rate of 1 kg per week, it is important to know 1 kg is equal to how many calories. There are a total of 7700 calories in 1 kilogram of body fat.

How can a beginner start losing weight?

Regular exercise for at least 30 minutes per day and dietary changes that induce a calorie deficit, such as cutting out empty carbs, processed foods, products with added sugars, etc., can help you lose about half a kilo to one kilo of weight every week.

How To Start The Workout For Fat Loss?

To start the workout, you have to figure out your weight and BMI. This is not limited to weight alone because your gender, race, ethnicity, and height play equally important roles.

Women generally have more fat as compared to men, and the average weight of a man is much more than women. So, you can use any online BMI calculator to figure out your BMI.

Now, simply look for the average BMI for someone your age, height, and gender, and this will estimate how much weight you need to lose.

It is important to exercise as much as possible to lose weight. But exercising in a gym can be expensive, and not everyone has the time or money to go there. Luckily, some exercises at home are just as effective.

10 BEST Weight Loss Exercises To Reduce Weight At Home

Disclaimer:

The information provided in this blog post, is for general informational purposes only and is not intended as a substitute for professional fitness or medical advice. Exercise routines and fitness recommendations can vary greatly depending on individual health status, physical condition, and fitness goals.

We strongly recommend consulting with healthcare and fitness professionals before beginning any new exercise program. The use of any information provided in this blog is solely at your own risk.

Monday, November 4, 2024

10 Best Back Foam Roller Exercises That Actually Work

 If you want to improve your back flexibility, reduce muscle soreness and tension, and improve your posture and alignment, you’ve come to the right place.

Back foam rolling is a simple and effective way to achieve these benefits. It requires just a foam roller and a few minutes of your time.

I personally enjoyed foam rolling. When I learned about its benefits, I realized it is a masterpiece for feeling better and moving more freely.

It also helps me recover after an intense workout routine

In this blog, we’ll cover the following topics:

  • Benefits of back foam rolling
  • Simple and effective back foam roller exercises
  • How to foam roll your back

What Causes Back Muscles Pain and Soreness?

People who spend much time sitting, such as office or remote workers, often report sore back muscles.

In addition, poor posture, prolonged periods of sitting or standing, intense workout routines, sleep position, and inadequate mattress support can all contribute to the problem.

Several other factors may also cause soreness in the back muscles.

  1. Poor posture
  2. Overuse or repetitive strain injuries
  3. Muscle tension and knots
  4. Lifting heavy objects or improper lifting technique
  5. Sudden movements or twisting of the spine
  6. Inactivity or prolonged sitting
  7. Muscular imbalances or weaknesses
  8. Medical conditions.

Why Back Foam Rolling Is Needed

Most of us have tension in our upper back, neck, and shoulders due to constant hunching over a computer at work, looking at our phones, and sitting and driving.

This constant slumping can create stiffness and tightness over time, not to mention postural imbalances. Stretching is a great place to begin, but foam roller exercises for back pain are another effective option.

Foam rolling is a popular form of self-myofascial release (SMR) that involves using a foam roller to apply pressure to specific body areas.

Foam rolling helps remove adhesions in the fascia of back muscles, leading to increased flexibility, mobility, and blood flow. This can increase flexibility and mobility, reduce pain, and improve physical performance.

Caution: If you have medical conditions such as herniated discs, sciatica, or arthritis, it is important to consult a healthcare professional before performing any exercises, including foam rolling, as they may aggravate your condition.

Best Foam Roller Exercises.

A foam roller is a good way to loosen up muscles before a workout and reduce muscle soreness afterward.

It is very possible to find several trigger points throughout your body. When you hit a spot that’s especially painful or tight, pause here and try to relax.

To relieve back pain and tightness, do these exercises 3–4 times per week, even if your symptoms improve. T

ry these foam rolling exercises to improve back strength and flexibility.

1. Thoracic Spine Foam Roll (Upper Back)

Our upper back is exposed to much stress from daily activities such as exercising, sitting, and bending over. Since we cannot avoid doing these activities, loosening this area whenever it feels tight is important.

Foam rollers are an effective way to loosen the thoracic spine and alleviate pain. They target the middle and upper back muscles, including rhomboids and traps.

I used to think foam rolling was mostly for legs and back, but then I tried it on my back — It is AWESOME.

Benefits Of Foam Rolling Thoracic Spine

  • Reduces upper back pain and stiffness after intense gym workout.
  • Increases mobility and flexibility in the thoracic spine
  • Enhances breathing and lung capacity
  • Reduces tension in the shoulders and neck

How To Do

  1. Lay on your back with your knees bent, placing your hands behind the back of your head or in front of you, with the foam roller just below your shoulder blades.
  2. Lift your hips off the ­floor and slowly push through your heels to move back and forth from your mid-back to the top of your shoulder blades.
  3. Keep your spine and head aligned in a neutral position.
  4. When you find a sore spot, stop and hold the position for at least 10–30 seconds until you can feel the muscle relax.

Tips

  • Avoid rolling directly on your spine or lower back.
  • Keep your abs engaged to support your lower back and avoid overarching.
  • Breathe deeply and slowly to help relax your muscles and release tension.

2. Foam Roller Thoracic Spine Extension

Maintaining mobility in the thoracic spine is crucial to avoid shoulder, neck, and lower back pain. If the T-spine cannot move freely, adjacent joints must overcompensate, leading to instability and soft tissue damage.

Foam roller extensions can help increase thoracic spine mobility and prevent these issues.

Benefits Of Roller Thoracic Spine Extension

  • Help alleviate upper back pain,
  • Reduce tightness in the thoracic spine,
  • Improve posture and enhance athletic performance

How To Do

  1. Lay on your back with your knees bent, placing your hands behind the back of your head, with the foam roller just below your shoulder blades.
  2. Keep your hips on the floor and your feet hip-width apart. Slowly begin to bend backward over the roller.
  3. Stopping at a point where it feels comfortable.
  4. Return to the starting position and repeat.

Tips

  • Keep your neck relaxed
  • Avoid using your lower back to push yourself up.
  • Breathe deeply and slowly while doing the exercise.

3. Upper Back (Thoracic Spine Cross Friction)

It helps to release tension and knots in the muscles around the thoracic spine, improving mobility and reducing pain.

Benefits Of Thoracic Spine Cross-Friction

  • Reduced muscle tension and pain in the upper back
  • Increased blood flow to the area
  • Relief from headaches and neck pain

How To Do

  1. Lay on your back with your knees bent, placing your hands behind the back of your head, with the foam roller just below your shoulder blades.
  2. Keep your hips on the floor with your feet hip width apart.
  3. Position your back parallel to the floor, then begin to move side to side in a sideways motion.
  4. Spend 30 seconds to 2 minutes, depending on your level of discomfort.

Tips

  • Use a foam roller that is firm enough to provide pressure but not too hard to cause discomfort.
  • Breathe deeply and slowly to help relax your muscles.

4. Lats Foam Roll

Foam rolling the lats applies pressure to the lats muscles, which are located on the sides of the upper back.

The exercise is beneficial as it targets a challenging area to stretch. The roller acts like a deep tissue massage by kneading and pressing the lats, releasing small knots and tight spots.

I’ll be honest: the first time I tried this, it felt a little awkward and uneasy. But once I got the hang of it, it quickly became one of my favourite rolls.

Benefits Of Foam Rolling Lats

  • It benefits weightlifters and athletes, as it can help relieve sore muscles and prevent injury.
  • Reduces muscle tension and soreness in the lats
  • Improves flexibility and range of motion in the shoulders and upper back

How To Do

  1. Lay on your side and extend the bottom leg. Bend your top knee and keep your foot firmly pressed to the floor.
  2. Place the roller under the armpit and extend the bottom arm.
  3. Length the arm with the palm facing upwards.
  4. Then, use your legs to slowly shift your body 10–15 cm upwards and downwards.
  5. Repeat on the other side

Tips

  • Be careful not to roll too close to the shoulder joint, as this can cause discomfort or injury.
  • Use your free hand to support your body weight and control the pressure applied by the foam roller.
  • Pause for 5–6 seconds on tender spots and take slow, deep breaths to relax.

5. Roller Lats Hold And Stretch

Foam roller Lat hold and stretch focuses on stretching and releasing tension in the latissimus dorsi muscles, commonly known as the lats.

It helps to enhance the range of motion and reduce pain after intense exercise.

Benefits Of Roller Lats Hold And Stretch

  • Increase the flexibility of the lats muscles, making it easier to do daily activities and exercises.
  • Improve posture and reduce the risk of shoulder and back pain after a workout.

How To Do

  1. Lay on your side with the legs in a bent position that feels comfortable.
  2. Place the foam roller perpendicular to your body, under the middle to the upper part of your side back.
  3. The length of the arm with the palm facing upwards.
  4. Slowly pull the arm down towards your chest, bending at the elbow. Lengthen the arm and repeat.

Tips

  • Use a foam roller that is firm enough to provide adequate pressure but not so hard that it causes pain.
  • Breathe deeply and relax your muscles during the stretch.
  • Don’t roll over your rib cage or spine, which can cause injury.

6. Chest Opener Foam Roll

The chest opener foam roll is an exercise that uses a foam roller to stretch and open up the chest muscles, which can become tight and restrictive due to poor posture or too much sitting.

Chest openers improve posture and reduce back pain by preventing rounded shoulders and hunching that comes with long hours of sitting or computer work.

Benefits Of Chest Opener Foam Roll

  • It helps to reduce shoulder pain and tightness by opening up the chest muscles and reducing shoulder tension.
  • Increases shoulder mobility and flexibility by stretching the anterior deltoids, pec major, and pec minor muscles.

How To Do

  1. Place the foam roller horizontally on the ground and sit in front of it with your knees bent and feet flat on the ground.
  2. Lie back on the foam roller so that it is positioned across your upper back and shoulder blades.
  3. Spread your arms wide and out to the sides, with your palms facing upward.
  4. Take deep breaths and relax into the stretch, holding for 30–60 seconds before rolling off the foam roller.

Tips

  • Be sure to keep your head and neck supported throughout the stretch.
  • If the stretch is too intense, try using a smaller foam roller.
  • Focus on breathing deeply and relaxing into the stretch.

7. Glute Foam Roll

Glute foam rolling is a form of self-myofascial release that targets the gluteal muscles located in the buttocks.

According to the study, glute foam rolling can promote muscle relaxation, enhance hip range of motion and flexibility, and improve posture.

Benefits Of Foam Rolling Glute

  • Enhance range of motion and flexibility, improving overall athletic performance.
  • Improve muscle activation in the gluteals, which are important for daily activities like stair climbing and sports movements like running.

How To Do

  1. Sit on top of the foam roller and cross one ankle over the opposite knee. Use your hand to steady yourself.
  2. Relax your leg and tilt toward the bent leg. Slowly roll from the top to the bottom of the glute muscle.
  3. When you find a sore spot, stop and hold the position for at least 30 seconds until you can feel the muscle relax.
  4. Or roll back and forth over the glute for 30–60 seconds.
  5. Switch sides and repeat the process.

8. Bridge On Foam Roller

Bridge on Roller involves performing a bridge while lying on a foam roller. It is designed to challenge the core, glutes, and hamstrings while also improving balance and stability.

Benefits Of Doing Bridge On Foam Roller

  • Strengthens the glutes, hamstrings, and core muscles
  • Improves balance and stability
  • Increases flexibility in the hip flexors and lower back
  • Relieves tension in the lower back

How To Do

  1. Lie on your back with your knees bent and both feet resting on the foam roller.
  2. Place your arms parallel to your body for support.
  3. Carefully lift your spine off the mat, pushing your hips up towards the ceiling until you’re in a bridge position.
  4. Your body should be straight from your knees to your head.
  5. Hold the position for a few seconds, engaging your core, glutes, and hamstrings.
  6. Slowly lower your spine back down to the mat and repeat.

Tips

  • Keep your core engaged throughout the exercise
  • Focus on squeezing your glutes and hamstrings as you lift your hips
  • Use slow, controlled movements
  • If you feel any pain or discomfort, stop the exercise immediately

9. Plank on Foam Roller

Plank on Roller is a variation of the traditional plank exercise involving performing a plank while resting on a foam roller.

This exercise targets the core muscles, enhances balance and stability, and boosts overall body strength.

Benefits Of Doing Plank On Foam Roller

How To Do

  1. Place a foam roller on the floor and get into a plank position with your forearms resting on the roller and your feet on the floor.
  2. Ensure your elbows are directly under your shoulders and your body is straight from your head to your heels.
  3. Hold this position for 30 seconds to 1 minute, or as long as you can maintain proper form.
  4. To increase the difficulty, try lifting one foot off the ground and holding it for a few seconds, then switching to the other foot.

Tips

  • Keep your core muscles engaged.
  • Keep your back straight and avoid arching or rounding
  • Breathe deeply and evenly throughout the exercise
  • Start with shorter hold times and work your way up as you get stronger

10. Lower Back Roll

The lower back roll is a great exercise for relieving tension and pain in the lower back.

It helps to relieve tension and tightness in the lower back muscles, which can be caused by prolonged sitting or standing, poor posture, or exercise.

How To Do

  • lie on your back and horizontally place the foam roller below your lower back.
  • Bend your knees and press your feet into the ground.
  • Draw your knees towards your chest and place your hands on your thighs or shins.
  • Gently shift your weight to the right, lifting the left side of your low back off the foam roller.
  • Hold for a few seconds before shifting to the left.
  • Repeat this side-to-side movement for up to 1 minute, repeating 2 to 3 times.

Tips

  • Do slow and controlled movements.
  • Avoid rolling over bony areas or joints.

Tips For Foam Rolling the Back

  • It’s important not to roll over an area for too long, or you might experience bruising.
  • Try to identify your trigger point and maintain constant pressure over the area for at least 10–30 seconds while slowly breathing. Any discomfort or tenderness will gradually ease.
  • It’s always best to start light with a manageable amount of pressure and then slowly increase it as your body relaxes.
  • Slowly and specifically roll each targeted muscle for 1–2 minutes and rest between sets.
  • Try to relax while foam rolling. This will reduce the possibility of cramps and injury.
  • Rolling out can do more harm than good when it is done over the wrong areas, such as your lower back, and directly over a joint or bone.
  • Avoid rolling your lower back, as it can cause the spine to contract to protect itself. Consider using a tennis or lacrosse ball to alleviate lower back pain instead.
  • If an area is too painful to apply direct pressure, shift the roller and apply pressure to the surrounding area to gradually loosen the entire area.

FAQs

How does foam rolling help the back?

Foam rolling can help release tension and knots in the muscles of the back, which can relieve pain, improve posture, and increase mobility.

How often should I foam the roll my back?

It is generally recommended that you foam roll your back for 10–15 minutes a day, 3–4 times a week.

Which foam roller for the back is the best?

Long rollers are a good choice for your first foam roller. They are good for your back because they are long enough to cover your full back when they are positioned perpendicular to your spine.

Can foam rolling cause any harm?

Foam rolling can be uncomfortable, but it should not be painful. It is important to listen to your body and stop if you experience any sharp or intense pain.

It is also important to avoid foam rolling over areas of the spine or directly on areas of inflammation or injury.

Reference

Saturday, November 2, 2024

Chest Supported Row Alternatives

 Let’s look at the best chest-supported row alternative for building muscle and strength.

To add variety to your back workout routine, replace the chest-supported rows with a different exercise that works the same muscles (latissimus dorsi).

To perform the supported row, use dumbbells, cables, a barbell, a gym machine, or even your own body weight.

Before we deep dive into the best chest-supported row alternatives. We must remember, a good substitute of the supported row will be able to satisfy the following criteria:

  • Activate the back muscle groups, which are trained in the supported row
  • Isolate the muscle groups during execution.
  • Train the lat muscle through a more extended range of motion.

1. Inverted Row

If you are searching for a substitute for chest supported that you can easily do at home, then it is the best option for you.

The inverted row is another name for bodyweight rows. It puts your body horizontally, making it easier to perform.

It also works the back and shoulder muscles from a different angle and improves scapular retraction. Most people do this exercise on the Smith machine in the gym.

2. Bent Over Barbell Rows

If you are looking to strengthen the upper back and add massive muscle to the upper back region, then bent over barbell rows are the best upper back exercise.

Pulling the bar up higher toward the chest targets the upper latissimus and trapezius. Pulling the bar through a lower trajectory to touch the abdomen targets the lower lats.

3. Seated Cable Rows

If cable setup is available, you should try it as an alternative if chest supported row. It is an excellent exercise to build middle back muscles and this works on lower lats as well.

It can be done with wide and narrow grips. This exercise is done on a cable rowing machine with separate handles.

4. One Arm Dumbbell Rows

One Arm Dumbbell Rows are an excellent alternative to chest supported rows, and it provides the full-range motion to build the lats muscles.

This exercise helps to work on each side independently, thereby providing better muscle isolation and a longer range of motion.

5. T Bar Row

T bar Rows are a power exercise to build middle back muscles. Check the correct execution technique and blast your back muscles. It also works on the outer lats when done with a narrower grip.

T bar rows are done on a T bar machine or placing a barbell at the corner. T bar rows are a tough exercise, but building a strong back is a must to develop a quality physique, stay injury-free, and back pain-free for life.

Know More About Workout Plan

10 Best Gym Back Workout Machines To Build Mass and Strength

20 Best Cable Machine Back Exercises for Wider and Strong Back

10 Best Lower Back Cable Exercises (With Workout Routine)

10 Best Dumbbell Lower Back Exercises (With Workout Routines)

Best Full-Body Workouts You Can Do at Home

You want to stay fit, build strength, or even burn some calories, but the gym doesn’t fit your busy schedule. 

Feeling stuck?The good news is you don’t need fancy equipment or a pricey gym membership to achieve your fitness goalsYour bodyweight and home items can be an incredibly effective tool for getting a great workout.

In this post, we’ll walk you through beginner-friendly full-body workout routines that’ll make you feel like a gym pro in no time. 

I have also added a workout plan for intermediate and advanced fitness levels to follow after you conquer the beginner routine.

3-Day Full-Body Workout Plan

Day 1: Strength & Stability

  • Bodyweight Squats — 3 sets of 12 reps
  • Push-Ups (Knee or Standard) — 3 sets of 10–12 reps
  • Dumbbell Rows — 3 sets of 12 reps per side
  • Glute Bridges — 3 sets of 15 reps
  • Plank — 3 sets of 20–30 seconds

Day 2: Cardio & Core

  • Jumping Jacks — 3 sets of 30 seconds
  • Dumbbell Deadlifts (Lightweight) — 3 sets of 12 reps
  • Russian Twists — 3 sets of 15 reps per side
  • Mountain Climbers — 3 sets of 30 seconds
  • Bicycle Crunches — 3 sets of 15 reps per side

Day 3: Full Body Conditioning

  • Lunges — 3 sets of 12 reps per leg
  • Incline Push-Ups (on a chair or bench) — 3 sets of 12 reps
  • Dumbbell Shoulder Press — 3 sets of 12 reps
  • Standing Calf Raises — 3 sets of 20 reps
  • Dead Bug — 3 sets of 15 reps per side

4-Day Full-Body Workout Routine

Day 1: Full Body Strength

  • Bodyweight Squats — 3 sets of 12 reps
  • Push-Ups (Knee or Standard) — 3 sets of 10 reps
  • Dumbbell Rows — 3 sets of 10 reps per side
  • Glute Bridges — 3 sets of 15 reps
  • Plank — 3 sets of 20 seconds

Day 2: Full Body Cardio & Endurance

  • Jumping Jacks — 3 sets of 30 seconds
  • Alternating Reverse Lunges — 3 sets of 12 reps per leg
  • Incline Push-Ups (on a chair or elevated surface) — 3 sets of 12 reps
  • Standing Dumbbell Shoulder Press — 3 sets of 10 reps
  • Mountain Climbers — 3 sets of 30 seconds

Day 3: Full Body Power & Core

  • Goblet Squats (hold one dumbbell) — 3 sets of 12 reps
  • Bicep Curls — 3 sets of 12 reps (use water bottles if needed)
  • Tricep Dips (use a chair) — 3 sets of 10 reps
  • Russian Twists — 3 sets of 15 reps per side
  • Bicycle Crunches — 3 sets of 15 reps per side

Day 4: Full Body Mobility & Balance

  • Bodyweight Lunges — 3 sets of 12 reps per leg
  • Superman Hold — 3 sets of 20 seconds
  • Incline Push-Ups — 3 sets of 12 reps
  • Dead Bug — 3 sets of 12 reps per side
  • Calf Raises — 3 sets of 20 reps
Try this Beginner Calisthenics Workout Plan

5-Day Full Body At-Home Plan

Day 1: Full Body Basics

  • Bodyweight Squats — 3 sets of 12 reps
  • Push-Ups (Knee or Standard) — 3 sets of 10 reps
  • Dumbbell Rows — 3 sets of 10 reps per side
  • Glute Bridges — 3 sets of 15 reps
  • Plank — 3 sets of 20 seconds

Day 2: Full Body Cardio & Core

  • Jumping Jacks — 3 sets of 30 seconds
  • Reverse Lunges — 3 sets of 12 reps per leg
  • Mountain Climbers — 3 sets of 30 seconds
  • Bicycle Crunches — 3 sets of 15 reps per side
  • Russian Twists — 3 sets of 15 reps per side

Day 3: Full Body Strength

  • Goblet Squats (hold one dumbbell) — 3 sets of 12 reps
  • Incline Push-Ups (on a chair or bench) — 3 sets of 12 reps
  • Standing Dumbbell Shoulder Press — 3 sets of 10 reps
  • Standing Calf Raises — 3 sets of 20 reps
  • Dead Bug — 3 sets of 12 reps per side

Day 4: Full Body Conditioning

  • Bodyweight Lunges — 3 sets of 12 reps per leg
  • Tricep Dips (on a chair) — 3 sets of 10 reps
  • Dumbbell Bicep Curls — 3 sets of 12 reps
  • Standing Dumbbell Side Raises — 3 sets of 10 reps
  • Superman Hold — 3 sets of 20 seconds

Day 5: Full Body Mobility & Core Focus

  • Bodyweight Step-Ups (on a chair or step) — 3 sets of 12 reps per leg
  • Incline Push-Ups — 3 sets of 12 reps
  • Bird Dog — 3 sets of 15 reps per side
  • Side Plank (Knee or Standard) — 3 sets of 15 seconds per side
  • Child’s Pose Stretch — 3 sets of 20 seconds

Beginner At-Home Full Body Workout Routine

We have a beginner-friendly home workout plan for you. This at-home routine includes various bodyweight exercises to help you start your fitness journey without fancy equipment.

Upper Body

  • Knee Push-ups: 3 sets of 8–10 reps, with 60 seconds rest.
  • Chair Dips: 3 sets of 8–10 reps, with 60 seconds rest.
  • Knee Plank: 3 sets of 20 seconds, with 30 seconds rest.
  • Superman: 3 sets of 8–10 reps, with 60 seconds rest.
  • Russian Twists: 3 sets of 8–10 reps, with 60 seconds rest.

Lower Body

  • Squats: 3 sets of 10–12 reps, with 60 seconds rest.
  • Lunges: 3 sets of 10 reps per leg, with 60 seconds rest.
  • Glute Bridges: 3 sets of 10–12 reps, with 60 seconds rest.
  • Calf Raises: 3 sets of 12–15 reps, with 60 seconds rest.

Full Body

  • Knee Push-ups: 3 sets of 10–12 reps, with 60–90 seconds rest.
  • Step Ups: 3–4 sets of 8–10 reps, with 60–90 seconds rest.
  • Shoulder Circles: 3 sets of 10–12 reps, with 60 seconds rest.
  • Plank: 3 sets of 20–30 seconds, with 60 seconds rest.
  • Bird Dog: 3 sets of 10–12 reps, with 60 seconds rest.
  • Knee Diamond Push-ups: 3 sets of 8–10 reps, with 60 seconds rest.

How To Design You Own Full Body Workout Plan

 Fitness and health do not necessarily require a gym membership or fancy equipment. With the right set of exercises, you can create an effective full-body workout right in the comfort of your home. 

Whether you're pressed for time, on a budget, or simply prefer exercising privately, here’s a list of strategies and exercises that cater to all fitness levels.


1. Design Your Workout Routine

Before you begin exercising, plan out your workout routine. A balanced full-body workout typically includes exercises that target all major muscle groups. 

You should include a mix of cardio, strength, flexibility, and balance exercises. 

Commit to a schedule, such as working out for 30-45 minutes three to five times weekly. 

2. Warm-Up

Starting your workout with a warm-up is crucial to prevent injuries and prepare your body for more intense activity. 

Spend 5-10 minutes doing light aerobic exercises like jogging in place, jumping jacks, or dynamic stretching exercises such as leg swings and arm circles.

3. Bodyweight Exercises

Bodyweight exercises are great for strength training without equipment. Here are a few effective ones:

  • Squats
  • Push-Ups
  • Planks
  • Lunges

4. Cardiovascular Exercises

To keep your heart healthy and to burn calories, include cardio exercises in your routine:

  • Jump Rope
  • High Knees
  • Burpees

5. Core Strengthening Exercises

A strong core is vital for overall stability and strength. Here are several exercises that target the core muscles:

  • Sit-Ups
  • Bicycle Crunches
  • Russian Twists

6. Cool Down and Stretch

After your workout, it's important to gradually cool down to bring your heart rate back to normal. 

Spend at least 5-10 minutes doing gentle stretching to help relax your muscles and improve flexibility.


7. Consistency is Key

When starting a home workout regime, consistency is more important than intensity. Try to stick to your workout schedule and make it a habit. 

Even short workout sessions on busy days can contribute significantly to your overall fitness.

8. Stay Hydrated and Eat Healthily

Drinking plenty of water is crucial, especially if you're sweating out during workouts. 

Also, fuel your body with nutritious foods that provide the energy you need to perform and recover from your exercises.

9. Monitor Your Progress

Track your workouts and any improvements in your fitness level. 

Monitoring progress can boost your motivation and help you adjust your workout plan as necessary. 

10. Get Adequate Rest

Get adequate rest to allow your body to recover. Sleeping well directly affects your physical and mental health, which in turn impacts your fitness progress and energy levels for workouts.

Implementing these home-based workout tips will help you maintain a balanced, full-body regimen that enhances your strength, flexibility, and endurance without stepping into a gym. 

As with any new exercise program, consult with a healthcare provider to ensure that these activities are appropriate for your health status.


Plank Calories Burned Calculator

Plank Exercise Calories Burned Calculate calories burned during plank exercises. Input your detail...